![]()


![]()
mini-nfv
Mini-nfv is a framework for NFV Orchestration with a general purpose VNF Manager to deploy and operate Virtual Network Functions (VNFs) and Network Services on Mininet. It is based on ETSI MANO Architectural Framework.
Mini-nfv manages the life-cycle of a Virtual Network Function (VNF). Mini-nfv takes care of deployment, monitoring, scaling and removal of VNFs on Mininet.
Mini-nfv allows loading OASIS TOSCA templates (V1.0 CSD 03) into Mininet, following an OpenStack Tacker’s alike workflow. Within Tacker’s documentation it can be found a comprehensive VNF Descriptor Template Guide.
Mini-nfv uses TOSCA for VNF meta-data definition. Within TOSCA, mini-nfv uses NFV profile schema:
- TOSCA YAML
- TOSCA NFV Profile:
Publications
-
J. Castillo-Lema, A. Venâncio Neto, F. de Oliveira and S. Takeo Kofuji, “Mininet-NFV: Evolving Mininet with OASIS TOSCA NVF profiles towards reproducible NFV prototyping”, 2019 IEEE Conference on Network Softwarization (NetSoft), Paris, France, 2019, pp. 506-512, doi: 10.1109/NETSOFT.2019.8806686.

-
CASTILLO LEMA, José. A generic Network Function Virtualization Manager and Orchestrator for Content-Centric Networks [doi:10.11606/T.3.2019.tde-23102019-120559]. São Paulo : Polytechnic School of the University of São Paulo, 2019. PhD. Thesis in Electronic Systems. [last accessed 2020-06-01].

Use cases
In the OpenStack world, Tacker is the project implementing a generic VNFM and NFVO. At the input consumes Tosca-based templates, which are then used to spin up VMs on OpenStack. While it is true that today exist various tools that simplify the deployment of an OpenStack cloud (i.e.: devstack), deploying, configuring and managing OpenStack environments is still a time-consuming process with a considerable learning curve.
On the other hand, Mininet has shown itself as a great tool for agile network/SDN/NFV experimentation. The goal of mini-nfv is to alleviate the developers’ tedious task of setting up a whole service chaining environment and let them focus on their own work (e.g., developing a particular VNF, prototyping, implementing an orchestration algorithm or a customized traffic steering).
Automation / Jinja2 support
On top of that, mini-nfv supports Jinja2, a full featured and designer-friendly template engine for Python, with an integrated sandboxed execution environment. This way, developers can easily automate the scale-out of vNF deployments and NFV orquestration graphs within the TOSCA templates. Inside the TOSCA templates, variables or expressions can be defined, as in for example:
ip_dst_prefix: ’{{ ip_dst }}’
It is also possible to define tags, which control the logic of the template:
{% ip_masq == 24 %}
Variables will then be replaced with values when the templates are rendered. This can be done interactively through mini-nfv CLI, as in:
px import yaml; net.values=yaml.load (’---\nip_dst: 10.0.40.10/24’)
Like this, using only one parametrized template it is possible to deploy any number of VNFs/VNFDs/VNFFGs with varying parameters.
Characteristics
NFV Catalog
- VNF Descriptors
- Network Services Decriptors
- VNF Forwarding Graph Descriptors
VNF Manager
- Basic life-cycle of VNF (create/update/delete)
- Facilitate initial configuration of VNF
NFVO Orquestrator
- Templatized end-to-end Network Service deployment using decomposed VNFs
- VNF placement policy – ensure efficient placement of VNFs
- VNFs connected using an Service Function Chain (SFC) - described in a VNF Forwarding Graph Descriptor
- Symmetrical and asymmetrical traffic from and to the VNFs! (currently Tacker/OpenStack VIM driver only support asymmetrical unidirectional traffic)
Mini-nfv supports:
- Jinja2 templating, to automate the scale-out of vNF deplyments and NFV orquestration graphs within the TOSCA templates ↵
- network definition via VL ↵
- IP/mac definition via CP ↵
- emulation of num CPUs and flavor properties through Mininet’s CPULimitedHost ↵
- cloud-init scripts ↵
Mini-nfv ignores:
- RAM and disk properties
- Floating IPs
- NUMA topology
- SR-IOV
Mini-nfv has not implemented (yet):
- Monitoring/autoscaling of VNFs
- Network Service Descriptors (NSDs)
- Explicit support for containers/NETCONF/Click-based VNFs
Network definition
If not specified otherwise, mini-nfv will create 3 standards networks:
- net_mgmt: 192.168.120.0/24
- net0: 10.10.0.0/24
- net1: 10.10.1.0/24
It is also possible to manually define the networks, within the Virtual Link (VL) definition, see tosca-vnfd-network.yaml:
VL2:
  type: tosca.nodes.nfv.VL
  properties:
    network_name: custom_net0
    vendor: Tacker
    ip_version: 4
    cidr: '20.0.0.0/24'
    start_ip: '20.0.0.50'
    end_ip: '20.0.0.200'
    gateway_ip: '20.0.0.1'
IP/MAC definition
If not specified otherwise, mini-nfv will assign random IPs within the defined networks. However, it is also possibly to manually define IP/MAC for a VNF, within the Connection Point (CP) definition, see tosca-vnfd-mac-ip.yaml:
CP1:
  type: tosca.nodes.nfv.CP.Tacker
  properties:
    management: true
    mac_address: 6c:40:08:a0:de:0a
    ip_address: 10.10.1.12
    order: 0
    anti_spoofing_protection: false
  requirements:
    - virtualLink:
        node: VL1
    - virtualBinding:
        node: VDU1
Flavor and number of cpus
Mini-nfv emulates VNF resource configuration defined via num_cpus properties:
VDU1:
  type: tosca.nodes.nfv.VDU.Tacker
  capabilities:
    nfv_compute:
      properties:
        num_cpus: 1
        mem_size: 512 MB
        disk_size: 1 GB
or through flavor:
VDU1:
  type: tosca.nodes.nfv.VDU.Tacker
  properties:
    flavor: m1.tiny
Mini-nfv maps flavors and number of cpus property configuration into Mininet’s CPULimitedHost. Currently, mini-nfv support the folowing flavors:
- m1.tiny: 1 cpu
- m1.small: 1 cpu
- m1.medium: 2 cpus
- m1.large: 4 cpus
- m1.xlargue: 8 cpus
Mini-nfv will assign 1/(8-num_cpus))) to each VNF.
Cloud-init
Mini-nfv supports VNFs configuration through user-data, see tosca-vnfd-userdata.yaml:
VDU1:
  type: tosca.nodes.nfv.VDU.Tacker
  properties:
    user_data_format: RAW
    user_data: |
      #!/bin/sh
      echo "my hostname is `hostname`" > /tmp/hostname
      df -h > /tmp/diskinfo
Dependencies
Mini-nfv was tested on Ubuntu 14.04, 16.04 and 18.04.
APT dependencies:
mininet-
openvswitch-testcontroller(in Ubuntu 16.04 and 18.04) -
python-netaddr(it can also be installed viapip) -
python-yaml(it can also be installed viapip)
Via pip
$ pip install -r ./requirements.txt
Via pipenv
$ pipenv install
If you are running Ubuntu 16.04, the openvswitch-ovscontroller was recently renamed to openvswitch-testcontroller.
To solve it, you need to create a symbolic link to ovs-testcontroller that is called ovs-controller.
$ sudo ln /usr/bin/ovs-testcontroller /usr/bin/ovs-controller
In Ubuntu 18.04 openvswitch-testcontroller must be stopped before running mini-nfv in standalone mode.
$ sudo systemctl stop openvswitch-testcontroller.service
mini-nfv
Usage: mininfv [options]

The mininfv utility loads vNFs into Mininet networks from the command line.
It can create parametrized topologies, invoke the mininfv CLI, and run tests.

Options:
  -h, --help            show this help message and exit
  --controller=CONTROLLER
                        remote=RemoteController
Whithou any explicit options mininfv runs mininet with its default controller. This way can be usefull to test the VNF Manager functionality with full connectivity between VNFs hosts and NFV Orchestration capabilities without the need of running POX, Ryu or other SDN controller. However, if you wish to include a SDN controller into your experiments mininfv must be run with the --controller=remote option alongside with the controller running in the background, for example:
$ ./pox.py pox.forwarding.l3_learning openflow.discovery                              or
$ ./pox.py log.level --DEBUG pox.forwarding.l3_learning openflow.discovery           (debug mode)
mini-nfv debugging
During a mini-nfv session, the openvswitch status can be debugging using the following commands (from outside mininfv CLI):
$ sudo ovs-vsctl show
bece8326-e719-4b6f-abee-a422f6904808
    Bridge "s192.168.1"
        Controller "tcp:127.0.0.1:6633"
            is_connected: true
        fail_mode: secure
        Port "s192.168.1"
            Interface "s192.168.1"
                type: internal
        Port "s192.168.1-eth1"
            Interface "s192.168.1-eth1"
    ovs_version: "2.5.4"
To show the ports attached to a specific switch:
$ sudo ovs-ofctl show s192.168.1
OFPT_FEATURES_REPLY (xid=0x2): dpid:00000000000000c0
n_tables:254, n_buffers:256
capabilities: FLOW_STATS TABLE_STATS PORT_STATS QUEUE_STATS ARP_MATCH_IP
actions: output enqueue set_vlan_vid set_vlan_pcp strip_vlan mod_dl_src mod_dl_dst mod_nw_src mod_nw_dst mod_nw_tos mod_tp_src mod_tp_dst
 1(s192.168.1-eth1): addr:72:cb:47:5b:23:ec
     config:     0
     state:      0
     current:    10GB-FD COPPER
     speed: 10000 Mbps now, 0 Mbps max
 LOCAL(s192.168.1): addr:ae:89:9f:63:e5:47
     config:     PORT_DOWN
     state:      LINK_DOWN
     speed: 0 Mbps now, 0 Mbps max
OFPT_GET_CONFIG_REPLY (xid=0x4): frags=normal miss_send_len=0
To dump the flows of a specific switch:
$ sudo ovs-ofctl dump-flows s192.168.1
NXST_FLOW reply (xid=0x4):
 cookie=0x0, duration=244.774s, table=0, n_packets=9, n_bytes=434, idle_age=0, priority=0 actions=CONTROLLER:128
From inside the mini-nfv session CLI, there are some commands that could also be usefull for debugging purposes:
mininfv> dump
<Host http_cl: http_cl-eth0:192.168.120.1 pid=26425>
<OVSSwitch s192.168.1: lo:127.0.0.1,s192.168.1-eth1:None pid=26420>
<OVSController c0: 127.0.0.1:6633 pid=26409>

mininfv> dpctl dump-flows
*** s192.168.1 ------------------------------------------------------------------------
NXST_FLOW reply (xid=0x4):
 cookie=0x0, duration=682.379s, table=0, n_packets=14, n_bytes=644, idle_age=432, priority=0 actions=CONTROLLER:128
VNF Manager
-
VNFD creation/listing/removal/template show
 $ sudo ./mininfv.py
 *** Configuring hosts
 *** Starting controller
 *** Starting 0 switches
 *** Starting CLI:

 mininfv> vnfd_<TAB>
 vnfd_create         vnfd_delete         vnfd_list           vnfd_template_show

 mininfv> vnfd_create
 Use: vnfd_create --vnfd-file <yaml file path> <VNFD-NAME>

 mininfv> vnfd_create --vnfd-file samples/vnfd/tosca-vnfd-userdata.yaml vnfd-userdata

 mininfv> vnfd_create --vnfd-file samples/vnfd/tosca-vnfd-hello-world.yaml vnfd-helloworld

 mininfv> vnfd_list
 vnfd-helloworld: Demo example
 vnfd-userdata: Demo with user-data

 mininfv> vnfd_template_show vnfd-userdata
 {'VDU1': {'type': 'tosca.nodes.nfv.VDU.Tacker', 'properties': {'image': 'cirros-0.3.5-x86_64-disk', 'user_data_format': 'RAW', 'config': 'param0: key1\nparam1: key2\n', 'user_data': '#!/bin/sh\necho "my hostname is `hostname`" > /tmp/hostname\ndf -h > /tmp/diskinfo\n', 'mgmt_driver': 'noop'}, 'capabilities': {'nfv_compute': {'properties': {'mem_size': '512 MB', 'num_cpus': 1, 'disk_size': '1 GB'}}}}, 'CP1': {'type': 'tosca.nodes.nfv.CP.Tacker', 'requirements': [{'virtualLink': {'node': 'VL1'}}, {'virtualBinding': {'node': 'VDU1'}}], 'properties': {'anti_spoofing_protection': False, 'management': True, 'order': 0}}, 'VL1': {'type': 'tosca.nodes.nfv.VL', 'properties': {'network_name': 'net_mgmt', 'vendor': 'ACME'}}}

 mininfv> vnfd_delete vnfd-userdata

 mininfv> vnfd_list
 vnfd-helloworld: Demo example
Or just source
vnfd_testfrom mininfv:mininfv> source samples/topology/vnfd_test *** Creating vnfds userdata and hello-world ... *** Listing vnfds ... vnfd-helloworld: Demo example vnfd-userdata: Demo with user-data *** Showing vnf template ... {'tosca_definitions_version': 'tosca_simple_profile_for_nfv_1_0_0', 'metadata': {'template_name': 'sample-vnfd-userdata'}, 'description': 'Demo with user-data', 'topology_template': {'node_templates': {'VDU1': {'type': 'tosca.nodes.nfv.VDU.Tacker', 'properties': {'image': 'cirros-0.3.5-x86_64-disk', 'user_data_format': 'RAW', 'config': 'param0: key1\nparam1: key2\n', 'user_data': '#!/bin/sh\necho "my hostname is `hostname`" > /tmp/hostname\necho 1 > /proc/sys/net/ipv4/ip_forward\nip route add default via 192.168.120.10\n', 'mgmt_driver': 'noop'}, 'capabilities': {'nfv_compute': {'properties': {'mem_size': '512 MB', 'num_cpus': 1, 'disk_size': '1 GB'}}}}, 'CP1': {'type': 'tosca.nodes.nfv.CP.Tacker', 'requirements': [{'virtualLink': {'node': 'VL1'}}, {'virtualBinding': {'node': 'VDU1'}}], 'properties': {'anti_spoofing_protection': False, 'management': True, 'order': 0}}, 'VL1': {'type': 'tosca.nodes.nfv.VL', 'properties': {'network_name': 'net_mgmt', 'vendor': 'ACME'}}}}} -
VNF creation/listing/removal
 $ sudo ./mininfv.py
 *** Configuring hosts
 *** Starting controller
 *** Starting 0 switches
 *** Starting CLI:

 mininfv> vnf_<TAB>
 vnf_create  vnf_delete  vnf_list

 mininfv> vnf_create
 Use: vnf_create --vnfd-name <VNFD-NAME> <VNF-NAME>
      vnf_create --vnfd-file <yaml file path> <VNFD-NAME>
      vnf_create --vnfd-template <yaml file path> <VNFD-NAME>

 mininfv> vnf_create --vnfd-file samples/vnfd/tosca-vnfd-userdata.yaml vnfUD
 *** Initializing VDU vnf-userdata ...
 *** user-data : ('#!/bin/sh\necho "my hostname is `hostname`" > /tmp/hostname\ndf -h > /tmp/diskinfo\n',)

 mininfv> nodes
 available nodes are:
 c0 s192.168.1 vnfUD

 mininfv> vnf_list
 ['vnfUD']

 mininfv> vnfUD ifconfig
 ud-eth0   Link encap:Ethernet  HWaddr 76:2c:90:f5:72:13
           inet addr:192.168.120.10  Bcast:192.168.120.255  Mask:255.255.255.0
           inet6 addr: fe80::742c:90ff:fef5:7213/64 Scope:Link
           UP BROADCAST RUNNING MULTICAST  MTU:1500  Metric:1
           RX packets:41 errors:0 dropped:10 overruns:0 frame:0
           TX packets:8 errors:0 dropped:0 overruns:0 carrier:0
           collisions:0 txqueuelen:1000
           RX bytes:6751 (6.7 KB)  TX bytes:648 (648.0 B)

 mininfv> vnf_delete vnf-userdata

 mininfv> nodes
 available nodes are:
 c0 s192.168.1

 mininfv> vnf_list
 []
Or just source
vnf_testfrom mininfv:mininfv> source samples/topology/vnf_test *** Starting vnf <tosca-vnfd-userdata.yaml> ... *** Initializing VDU vnfUD ... *** vnfUD : ('#!/bin/sh\necho "my hostname is `hostname`" > /tmp/hostname\necho 1 > /proc/sys/net/ipv4/ip_forward\nip route add default via 192.168.120.10\n',) *** Listing vNF interfaces: vnfUD-eth0: flags=4163<UP,BROADCAST,RUNNING,MULTICAST> mtu 1500 inet 192.168.120.10 netmask 255.255.255.0 broadcast 192.168.120.255 inet6 fe80::7032:2dff:fe89:175e prefixlen 64 scopeid 0x20<link> ether 72:32:2d:89:17:5e txqueuelen 1000 (Ethernet) RX packets 0 bytes 0 (0.0 B) RX errors 0 dropped 0 overruns 0 frame 0 TX packets 0 bytes 0 (0.0 B) TX errors 0 dropped 0 overruns 0 carrier 0 collisions 0 *** Listing nodes: available nodes are: c0 s192.168.1 vnfUD -
Adding hosts to the topology
 $ sudo ./mininfv.py
 *** Configuring hosts
 *** Starting controller
 *** Starting 0 switches
 *** Starting CLI:

 mininfv> add_host
 Use: add_host <HOST-NAME> [<IP1/masc> <IP2/masc> ...]

 mininfv> add_host h1 10.0.0.11/24 20.0.0.11/24

 mininfv> nodes
 available nodes are:
 c0 h1 s10.0.0.0 s20.0.0.0 ud

 mininfv> h1 ifconfig
 h1-eth0   Link encap:Ethernet  HWaddr 3e:b2:ba:99:4e:dc
           inet addr:10.0.0.11  Bcast:10.255.255.255  Mask:255.255.255.0
           inet6 addr: fe80::3cb2:baff:fe99:4edc/64 Scope:Link
           UP BROADCAST RUNNING MULTICAST  MTU:1500  Metric:1
           RX packets:24 errors:0 dropped:1 overruns:0 frame:0
           TX packets:7 errors:0 dropped:0 overruns:0 carrier:0
           collisions:0 txqueuelen:1000
           RX bytes:3445 (3.4 KB)  TX bytes:578 (578.0 B)

 h1-eth1   Link encap:Ethernet  HWaddr aa:08:cf:38:e8:d5
           inet addr:20.0.0.10  Bcast:20.255.255.255  Mask:255.255.255.0
           inet6 addr: fe80::a808:cfff:fe38:e8d5/64 Scope:Link
           UP BROADCAST RUNNING MULTICAST  MTU:1500  Metric:1
           RX packets:25 errors:0 dropped:1 overruns:0 frame:0
           TX packets:7 errors:0 dropped:0 overruns:0 carrier:0
           collisions:0 txqueuelen:1000
           RX bytes:3515 (3.5 KB)  TX bytes:578 (578.0 B)

 mininfv> add_host h2 10.0.0.12/24

 mininfv> switch s10.0.0.0 start

 mininfv> h1 ping -c3 h2
 PING 10.0.0.12 (10.0.0.12) 56(84) bytes of data.
 64 bytes from 10.0.0.12: icmp_seq=1 ttl=64 time=2.93 ms
 64 bytes from 10.0.0.12: icmp_seq=2 ttl=64 time=0.736 ms
 64 bytes from 10.0.0.12: icmp_seq=3 ttl=64 time=0.142 ms

 --- 10.0.0.12 ping statistics ---
 3 packets transmitted, 3 received, 0% packet loss, time 2032ms
 rtt min/avg/max/mdev = 0.142/1.270/2.934/1.201 ms
Or just source
host_testfrom mininfv:mininfv> source samples/topology/host_test *** Creating host h1 with two interfaces ... *** Listing interfaces of the host: h1-eth0: flags=4163<UP,BROADCAST,RUNNING,MULTICAST> mtu 1500 inet 10.0.0.11 netmask 255.255.255.0 broadcast 10.0.0.255 inet6 fe80::609d:6fff:fe6e:eae8 prefixlen 64 scopeid 0x20<link> ether 62:9d:6f:6e:ea:e8 txqueuelen 1000 (Ethernet) RX packets 1 bytes 90 (90.0 B) RX errors 0 dropped 0 overruns 0 frame 0 TX packets 1 bytes 90 (90.0 B) TX errors 0 dropped 0 overruns 0 carrier 0 collisions 0 h1-eth1: flags=4163<UP,BROADCAST,RUNNING,MULTICAST> mtu 1500 inet 20.0.0.11 netmask 255.255.255.0 broadcast 20.0.0.255 inet6 fe80::bc42:45ff:fee1:6e0b prefixlen 64 scopeid 0x20<link> ether be:42:45:e1:6e:0b txqueuelen 1000 (Ethernet) RX packets 0 bytes 0 (0.0 B) RX errors 0 dropped 0 overruns 0 frame 0 TX packets 0 bytes 0 (0.0 B) TX errors 0 dropped 0 overruns 0 carrier 0 collisions 0 *** Creating host h2 *** Starting switch ... *** Listing nodes: available nodes are: c0 h1 h2 s10.0.0.0 s192.168.1 s20.0.0.0 vnfUD *** Testing conectivity ... PING 10.0.0.12 (10.0.0.12) 56(84) bytes of data. 64 bytes from 10.0.0.12: icmp_seq=1 ttl=64 time=3.43 ms 64 bytes from 10.0.0.12: icmp_seq=2 ttl=64 time=0.716 ms 64 bytes from 10.0.0.12: icmp_seq=3 ttl=64 time=0.111 ms --- 10.0.0.12 ping statistics --- 3 packets transmitted, 3 received, 0% packet loss, time 2003ms rtt min/avg/max/mdev = 0.111/1.419/3.430/1.443 ms
NFV Orchestrator
-
VNFFG creation/listing/removal
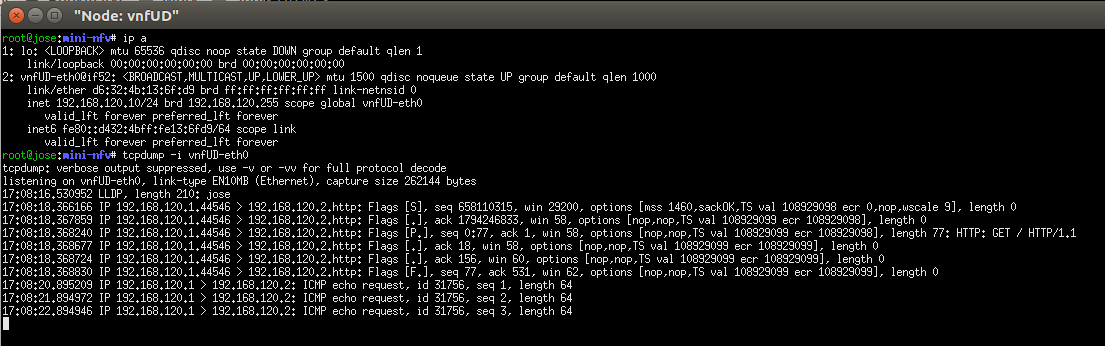
 $ sudo ./mininfv.py
 *** Configuring hosts
 *** Starting controller
 *** Starting 0 switches
 *** Starting CLI:

 mininfv> vnf_create --vnfd-file samples/vnfd/tosca-vnfd-userdata.yaml vnfUD
 *** Initializing VDU vnf-userdata ...
 *** user-data : ('#!/bin/sh\necho "my hostname is `hostname`" > /tmp/hostname\ndf -h > /tmp/diskinfo\n',)

 mininfv> add_host http_cl 192.168.120.1/24

 mininfv> add_host http_sr 192.168.120.2/24

 mininfv> nodes
 available nodes are:
 c0 http_cl http_sr s192.168.1 vnfUD

 mininfv> switch s192.168.1 start

 mininfv> py http_sr.cmdPrint('python -m SimpleHTTPServer 80 &')

 mininfv> vnffg_<TAB>
 vnffg_create  vnffg_delete  vnffg_list

 mininfv> vnffg_create
 Use: vnffg-create --vnffgd-name <vnffgd-name> --vnf-mapping <vnf-mapping>
                   --symmetrical <boolean> <vnffg-name>
      vnffg-create --vnffgd-template <vnffgd-template> --vnf-mapping <vnf-mapping>
                   --symmetrical <boolean> <vnffg-name>

 mininfv> vnffg_create --vnffgd-template samples/vnffgd/tosca-vnffgd-helloworld.yaml --vnf-mapping vnfd-helloworld:'vnfUD' --symmetrical false vnffg-sample

 mininfv> vnffg_list
 ['vnffg-sample']

 mininfv> xterm vnfUD

 mininfv> http_cl curl http_sr
 <!DOCTYPE html PUBLIC "-//W3C//DTD HTML 3.2 Final//EN"><html>
 ...

 mininfv> vnffg_delete vnffg-sample

 mininfv> vnffg_list
 []
Or just source
vnffg_testfrom mininfv:mininfv> source samples/topology/vnffg_testIn the xterm window of the vnfUD we opened at step 11, if we sniff the interface we can see the http and icmp traffic corresponding to the curl and ping passing through the VNF interface: